A Beginner’s Journey Into Astrophotography: What to Know, What to Bring, and What to Expect

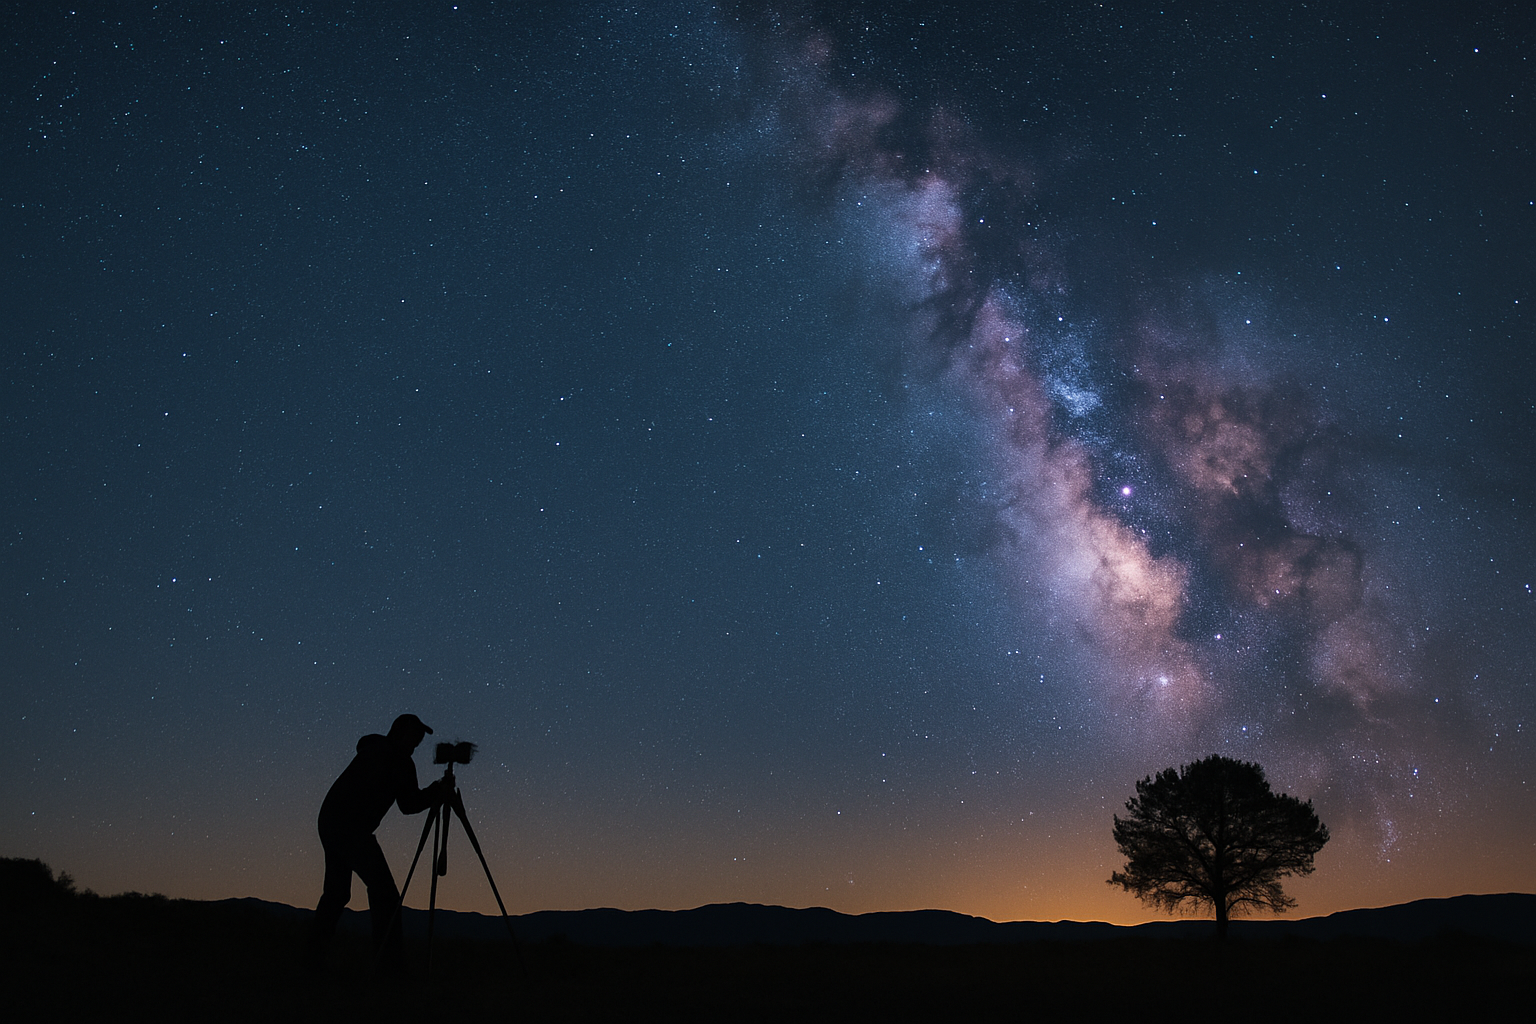
There’s something profoundly humbling about standing beneath a canopy of stars, camera in hand, attempting to capture the vastness of the universe. My first foray into astrophotography was a mix of awe and frustration. Frustrated by the technical challenges. It was during this time that I discovered The Beginner’s Guide to Astrophotography: How to Capture the Cosmos with Any Camera by Mike Shaw. This guide became an invaluable resource, bridging the gap between my enthusiasm and the technical know-how required to photograph the night sky.
Astrophotography, it turns out, isn’t just about fancy gear or software. It’s about understanding the night sky, making the most of what you have, and enjoying the journey from your first blurry starscape to stunning images of galaxies and constellations. In this guide, I’ll walk you through the core lessons I learned from Mike Shaw’s book and my own experience, covering everything from essential gear to post-processing techniques.
Understanding the Night Sky
Before diving into gear, Shaw wisely begins by helping readers understand the sky they’re trying to photograph. Celestial movements, light pollution, and timing all play crucial roles in successful astrophotography.
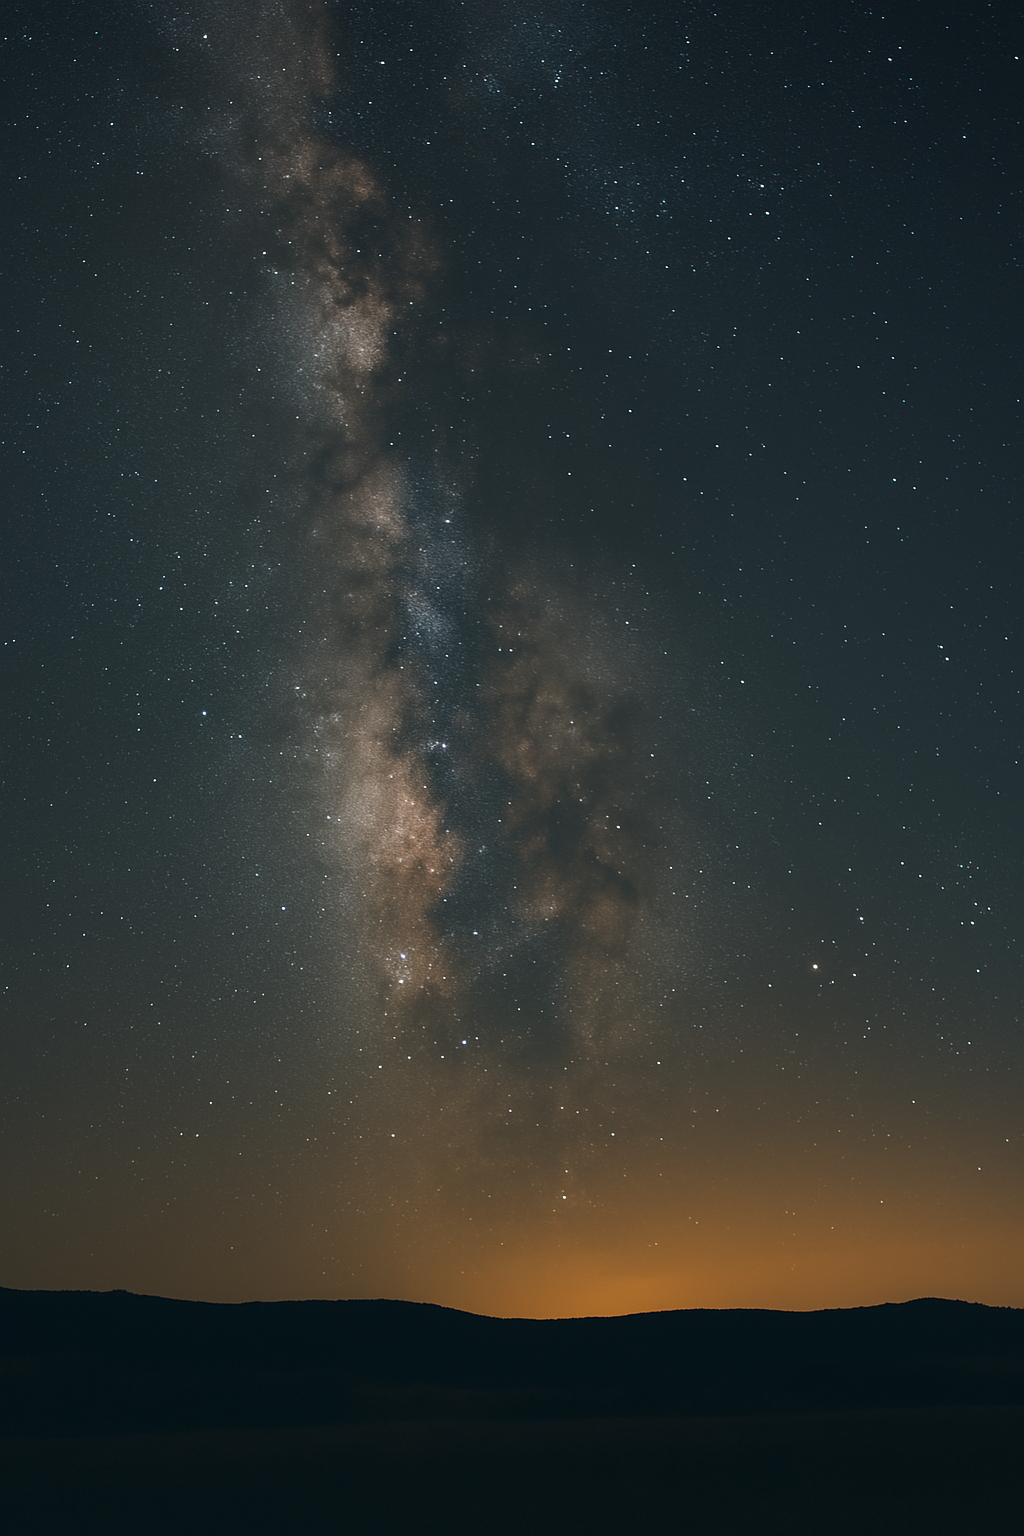
For instance, knowing when and where the Milky Way is visible can dramatically increase your chances of capturing a compelling image. Tools and apps like Stellarium, Sky Guide, and PhotoPills help you plan shoots with precision. He also emphasizes minimizing light pollution by seeking out dark-sky parks or rural locations, which can make a massive difference in your photo quality.
Beyond timing and location, Shaw encourages readers to learn the basics of night sky navigation. Getting familiar with constellations, using star charts, and recognizing the motion of the stars over time not only enhances your ability to frame shots but deepens your appreciation of the cosmos.
Cameras: Starting with What You Have
A common misconception is that astrophotography demands expensive, specialized cameras. That’s not true. Many beginners, myself included, start with a DSLR or mirrorless camera they already own. Cameras like the Canon EOS Rebel T7 or the Sony Alpha a6000 offer manual control over settings like ISO, aperture, and shutter speed are essential for night photography.
For those looking to level up, dedicated astrophotography cameras like the ZWO ASI series can capture faint deep-sky objects with enhanced sensitivity. Still, starting with a more common DSLR or mirrorless model helps you build core skills without breaking the bank.
Even some smartphones, such as the Google Pixel 4 and newer models, have astrophotography modes that can produce surprisingly good results. They’re not on par with dedicated setups, but they’re great for practice and experimentation.
Lenses: Wide Angle for the Win
The lens you use plays a massive role in how your astrophotography turns out. Shaw highlights the value of wide-angle lenses with low f-numbers (i.e., wide apertures) for capturing the night sky. A popular choice is the Rokinon 14mm f/2.8, which offers a large field of view and excellent light-gathering ability, which is perfect for showcasing the Milky Way or incorporating dramatic foreground elements like trees or mountains.
If you're using a zoom lens, Shaw suggests using it at its widest focal length to minimize star trails and maximize your sky coverage. The goal is always to balance focal length with exposure time.
Another key factor to consider is lens sharpness, especially at the edges of the frame. Many budget lenses tend to exhibit softness or distortion near the corners, which can be distracting when photographing star fields. While some post-processing techniques can help correct this, investing in a lens known for its edge-to-edge clarity, such as the Sigma 14mm f/1.8 Art, can greatly improve overall image quality. That said, it’s always worth testing your existing lens wide open and slightly stopped down (e.g., from f/2.8 to f/4) to find its optical sweet spot.
Manual focus capability is also crucial in astrophotography. Autofocus systems often struggle in low-light conditions, so lenses with smooth and precise manual focus rings make it easier to achieve critical sharpness. Prime lenses are often preferred for this reason, as they tend to offer better low-light performance and simpler construction than variable zoom lenses. Regardless of your choice, pairing your lens with a proper focusing technique, like live view magnification on a bright star, can make a huge difference in image sharpness.
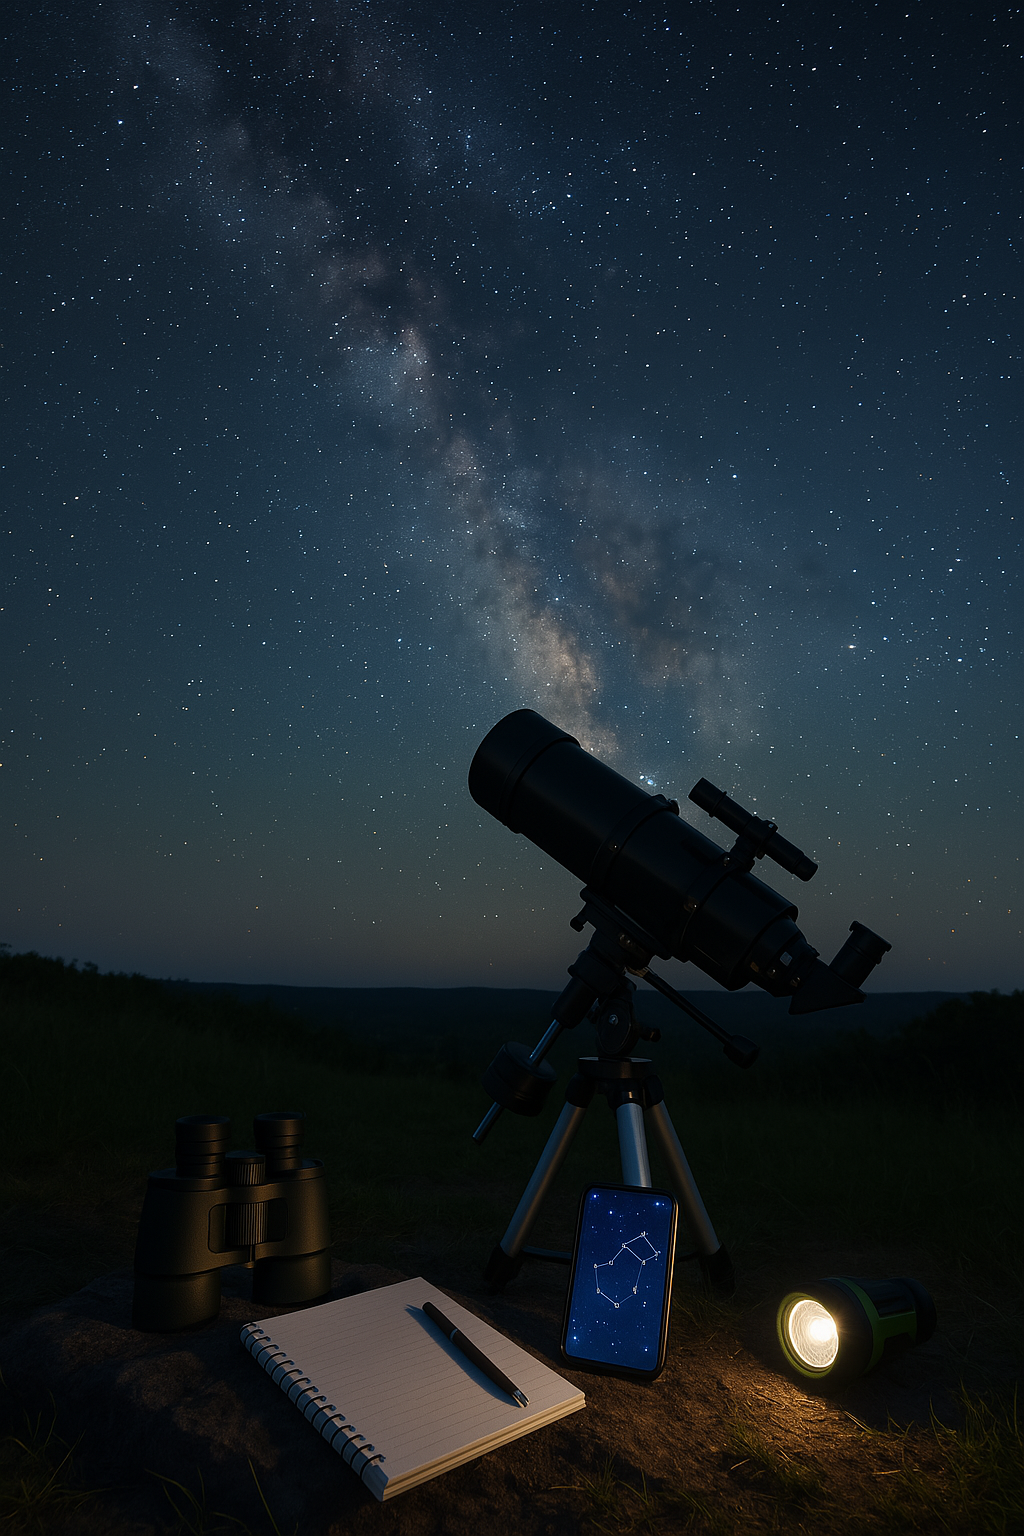
Tripods: Stability Is Non-Negotiable
Astrophotography requires long exposure times, which means camera movement, even the tiniest vibration, can ruin a shot. That’s why a sturdy tripod is essential. Shaw recommends models like the Manfrotto 290 Xtra Aluminum Ball Head Tripod Kit, which provides stability and flexibility in composition.
When choosing a tripod, prioritize build quality, weight capacity, and adjustable features like leg angles and ball head mounts. These let you frame shots creatively while keeping your camera rock steady during extended exposures.
Star Trackers: Keeping Up with the Cosmos
As you progress, you may notice that longer exposures create star trails due to Earth’s rotation. This is where star trackers come in. Devices like the Sky-Watcher Star Adventurer Pro Pack 2i with WiFi rotate your camera in sync with the stars, enabling you to take longer exposures without blurring.
While these devices add a layer of complexity, they’re game-changers if you want to capture detailed images of nebulae, galaxies, or star clusters. They also serve as a bridge between wide-angle landscape astrophotography and more advanced deep-sky imaging.
Telescopes: Zooming into the Cosmos
If you're drawn to photographing planets, the moon, or deep-sky objects like the Andromeda Galaxy, adding a telescope to your setup is the natural next step. Shaw explains that apochromatic refractor telescopes, like the William Optics RedCat 51, are preferred for their superior optical quality and minimal chromatic aberration.
To pair your telescope with a camera, you'll need the appropriate T-ring and adapters. You’ll also want to make sure your mount is capable of handling the telescope and camera together, especially for long exposures.
Techniques and Composition
Shaw is particularly helpful when it comes to camera settings. He breaks down the core concepts of ISO, aperture, and shutter speed in a way that feels intuitive. A standout tip is the “500 rule,” which helps determine the maximum exposure time you can use without noticeable star trails: 500 divided by the focal length of your lens gives you a good baseline in seconds.
Focusing in the dark is notoriously tricky. Shaw suggests using live view mode and zooming in on a bright star to manually focus, which is an approach that dramatically improved my own results.
On composition, Shaw encourages creative thinking. Including interesting foreground elements like trees, mountains, or old buildings can elevate your images from simple sky shots to captivating nightscapes.
Post-Processing: Bringing It All Together
Capturing the image is only half the battle. Shaw introduces post-processing techniques using Adobe Lightroom and Photoshop to adjust things like contrast, exposure, and color balance. This is where your raw images truly come to life.
He also touches on stacking, which is the combining multiple exposures to reduce noise and bring out detail, especially useful for deep-sky images. Tools like DeepSkyStacker make this technique approachable even for beginners.
Accessories and Extras
Several small but important tools can make your astrophotography experience smoother. A remote shutter release or intervalometer helps avoid camera shake during exposures. Light pollution filters can enhance image clarity in urban or suburban environments. And apps like PhotoPills help you plan compositions based on moon phases, Milky Way visibility, and more.
Final Thoughts
Embarking on your astrophotography journey requires a mix of curiosity, patience, and a willingness to experiment. Mike Shaw’s Beginner’s Guide does an excellent job of demystifying the process and empowering newcomers with the tools and knowledge they need.
You don’t need to start with a telescope or a dedicated astro camera. Use what you have, learn the fundamentals, and let your passion for the stars guide your progress. With each image, you’re not just capturing light. You’re capturing a moment in the endless dance of the cosmos.
You May Also Like

Top 5 Astronomy Apps to Explore the Night Sky
Discover the cosmos from your backyard with these top astronomy apps that turn your phone into a personal planetarium.
Signs of Life on Exoplanet K2-18b
Scientists have detected potential signs of life in the atmosphere of exoplanet K2-18b, sparking excitement and debate about the possibility of extraterrestrial biology.
Guide to Stargazing: Gear, Apps, and What to Look For
Stargazing is a rewarding hobby that anyone can enjoy, whether you’re armed with just your eyes or a high-end telescope.
Seasonal Astronomy: What I Look For in the Changing Sky
In this guide, I’ve outlined the highlights I look forward to in each season from mid-northern latitudes. It’s not just a list of objects to observe. It’s a framework for thinking about how our position in space affects what we can see, and when
Finding Dark Sky Astronomy Sites
Struggling with light pollution? This guide walks through how to find dark sky sites, make the most of backyard observing, and reduce local light interference. Plus tips on staying safe and becoming an advocate for preserving our night skies.
Open Source Satellite Trackers: Why Tinkerers Are Obsessed
I still remember the first time I received a signal from space with my own home-built setup. As a lifelong space enthusiast,